How to Make Plum Jam (with Clove & Vanilla) + My Tips for Getting It Right

A simple plum jam gently spiced with clove and vanilla. Lower in sugar, beautifully balanced, and easy to adapt once you understand the method.
Makes 3-4 x 270 ml jars
How to make plum jam

How to Make Plum Jam (with clove & vanilla) + My Tips for Getting it Right

How to make plum jam

Jump to Recipe

How to Make Plum Jam 

There are a few things I love teaching that always surprise people, and jam is one of them.

Not because it’s difficult (it’s not) — but because most people assume it is. An assumption that it requires special equipment, perfect ratios, or a level of precision that feels just out of reach.

And then we make it together, and it all feels so much simpler.

It becomes less about rules and more about understanding. Fruit, sugar, a little acidity, heat, and time. Once you see how those elements work together, it opens up a whole new way of cooking.

I think I’ve always been drawn to that style of cooking. The playful and experimental kind.

My GrandDad was a pickling champion (true story). Their home always smelled like vinegar & I loved it. Jars lined up, everything labelled with torn masking tape, nothing wasted. He was rather amazing, and I didn’t think much of it at the time, but I can see now how much his way of cooking & experimenting with what could be pickled and preserved has stayed with me. It’s in my blood.

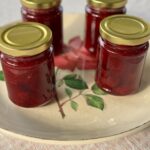
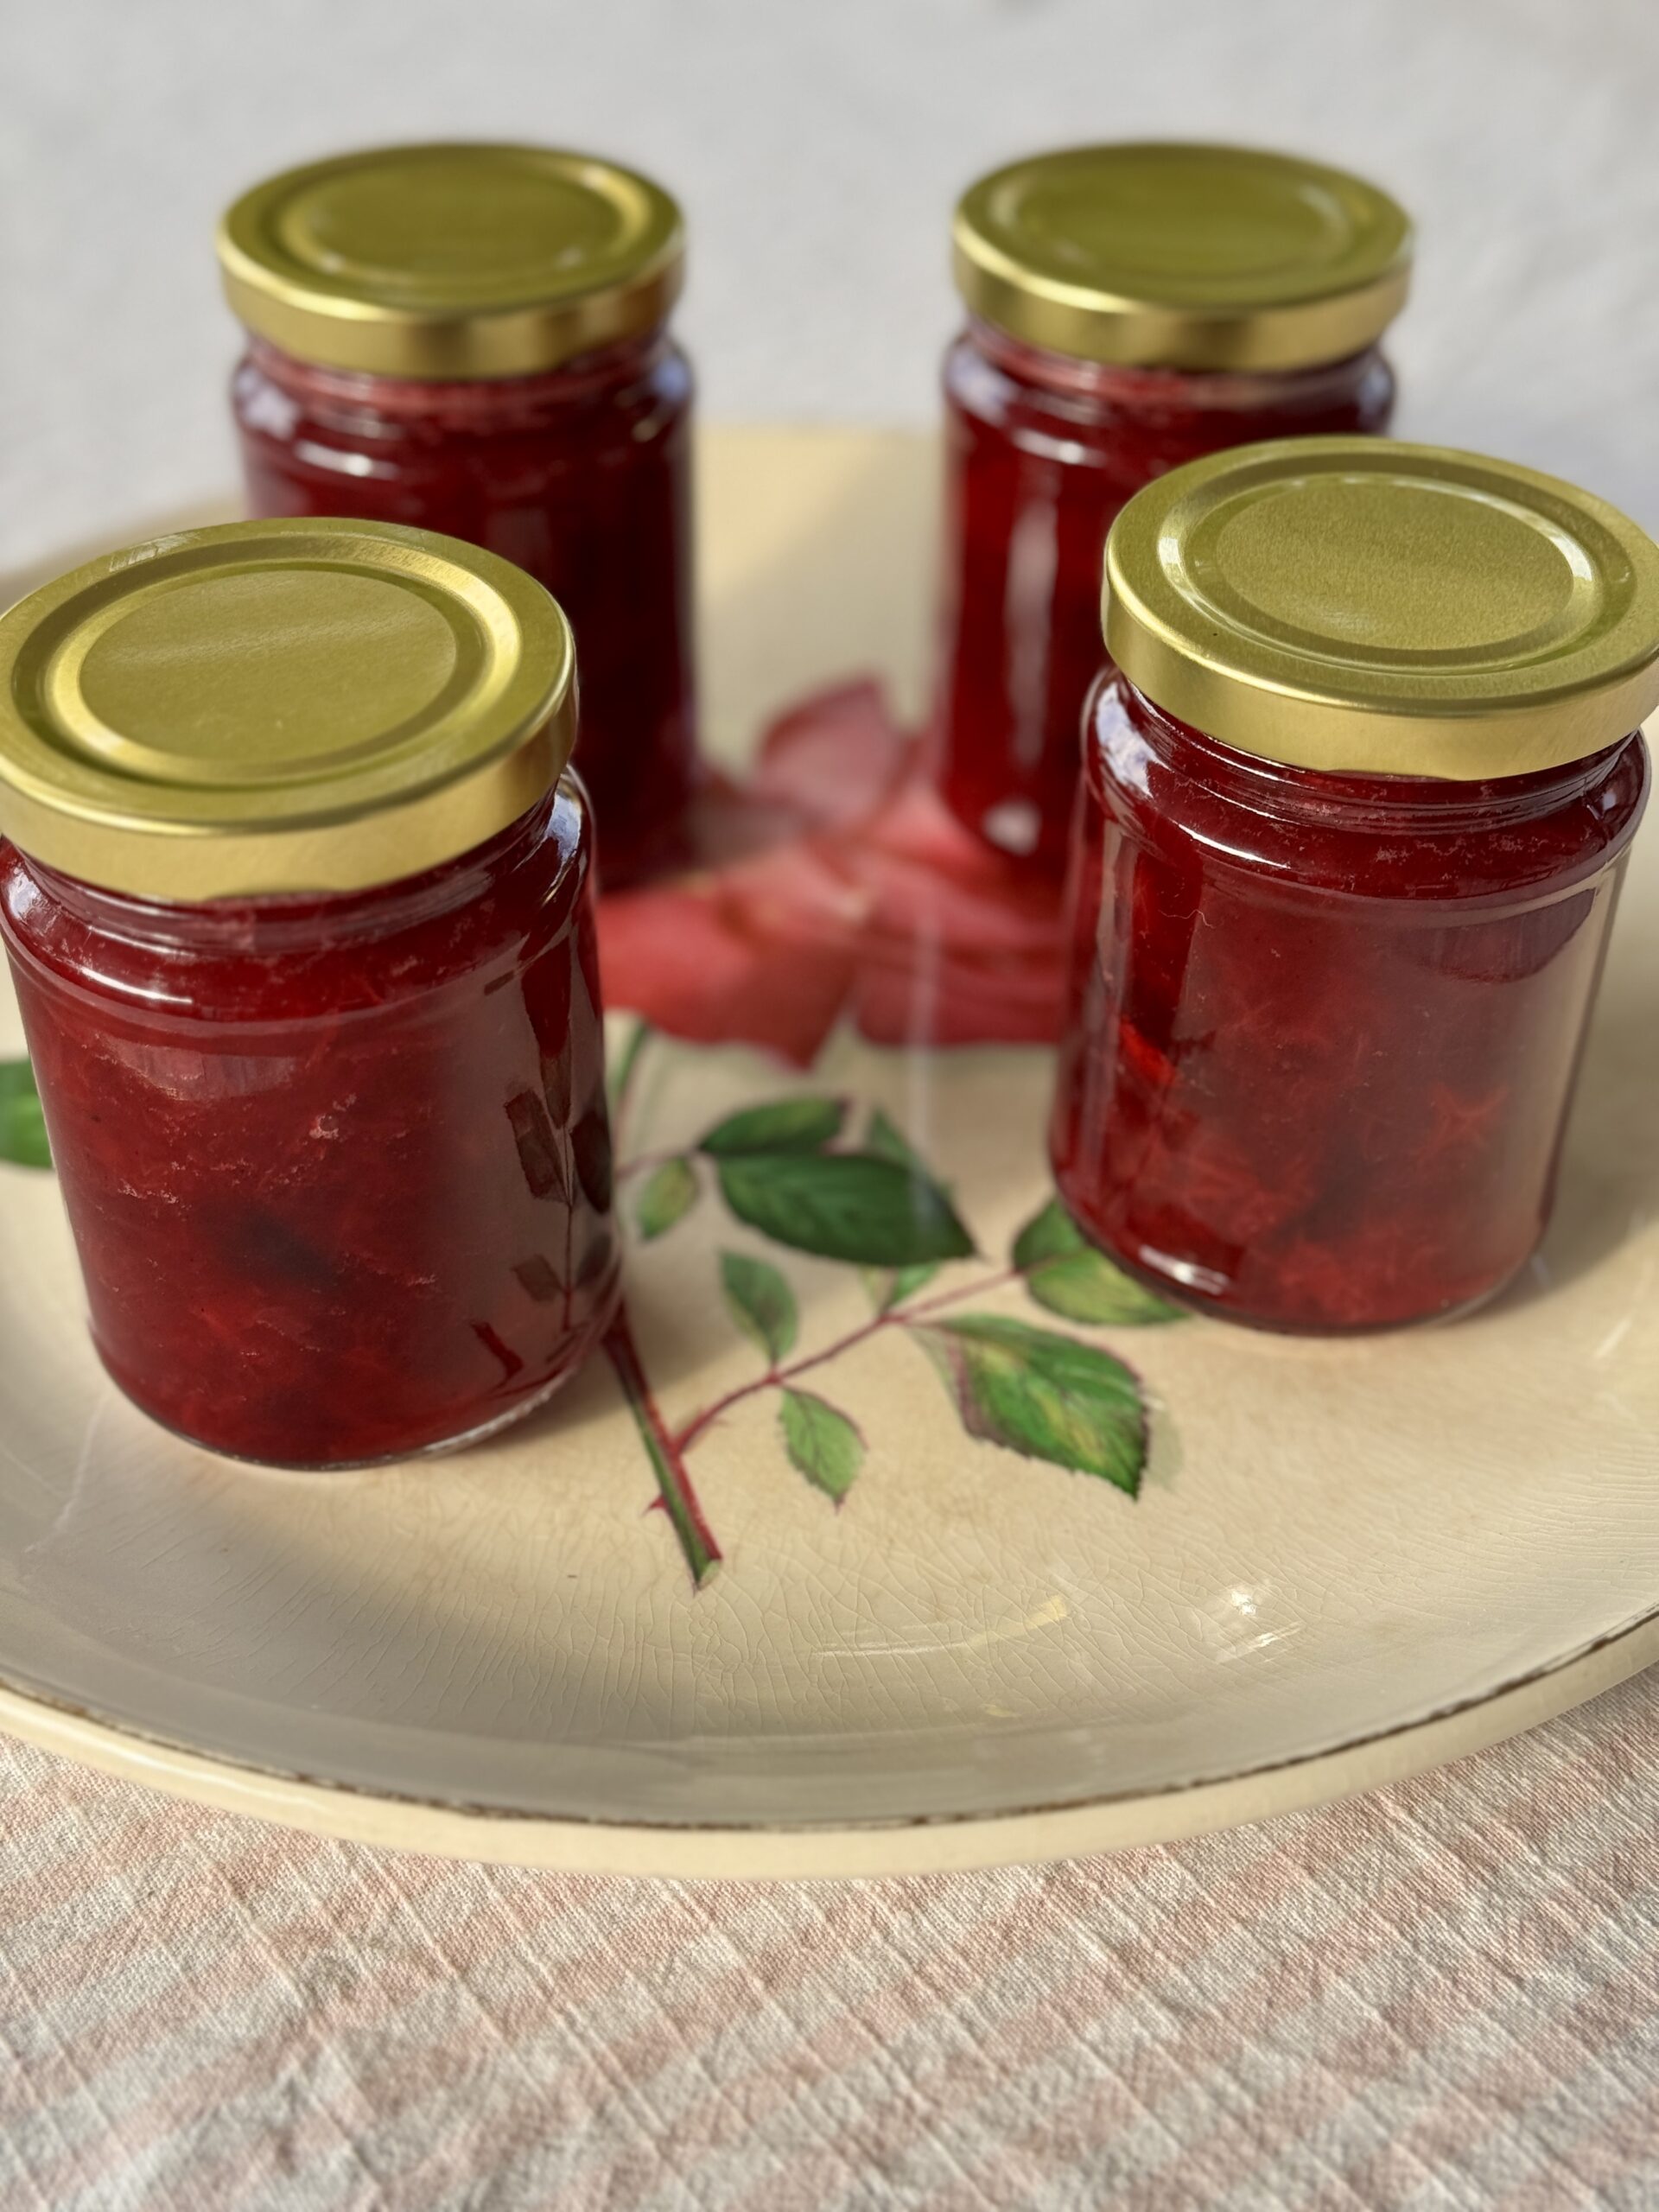
This particular plum jam – It’s not overly sweet, and it’s not trying to be anything fancy. Plums, a little clove for warmth, and vanilla bean to round it out. It’s simple, but it has depth — and it’s hopefully a jar you’ll find yourself reaching for more often than you expect.

Plums are in Season right now so I wanted to share how to make the best plum jam here with you. It is a great jam to play with.

One step I often encourage first — especially in class — is leaving the fruit overnight with the sugar and lemon.

It’s easy to skip, I understand that. Your jam will still be a success if you skip it but if you can prepare in advance, it’s worth it.

Why this step? By morning, the fruit will have softened and released its juices, and everything starts to look glossy and slightly syrupy. That’s the sugar gently drawing out moisture and beginning the process for you. When you cook it the next day, it comes together more evenly, the flavour feels more rounded, and the texture is noticeably better.

This is something I tend to do with firmer fruits like plums, apricots or peaches.

If you’re using softer fruits like raspberries or strawberries, you can absolutely skip this step and go straight to cooking. They break down quickly on their own and don’t need the extra time.

The part that tends to make people hesitate is knowing when the jam is ready.

I see it all the time.

There’s this idea that you can get it wrong — that it might not set, or that it will somehow fail. But in reality, it’s far more forgiving than that.

You’re simply watching for a change.

The bubbles slow down, the mixture thickens, and the fruit becomes glossy. If you run a spoon through it, it holds a little more. And if you use the cold plate trick (which I still do) you’ll see it wrinkle slightly when it’s ready.

That’s it.

And if it’s a little soft, that’s not a failure. A softer jam is beautiful in its own way — easier to spoon, perfect with yoghurt, or over something warm.

With Easter just around the corner, this Plum Jam is a lovely one to have on hand.

Spooned onto warm hot cross buns, served alongside Plum Cake, folded through yoghurt, or served alongside something savoury where you want a little sweetness to balance things out.

It’s also one of those recipes that doesn’t really stay a single recipe.

Once you’ve made it once, you’ll start adjusting without thinking — different fruit, a little more or less sugar, another / different spice. That’s when this jam becomes yours.

And I think that’s the real joy of preserving and demystifying how to make Plum jam or any jam for that matter.

Not just the jar at the end, but the wonderful confidence that comes from really understanding why and what you’re doing.

With love,


Nellie
x


Join Our Cooking Community

Do you love discovering new flavours, recipes and sharing your passion for food? At Relish Mama Cooking Club, we bring together home cooks who love great food, inspiring recipes, and meaningful connections. As a member, you’ll enjoy exclusive recipes, live online cooking classes, and a vibrant community of fellow food lovers.

🍽️ Learn, cook, and be inspired wherever you are.
👩‍🍳 Ready to take your cooking to the next level? Click here to explore.

We’d love to welcome you. 

How to make plum jam

How to Make Plum Jam (with Clove & Vanilla) + My Tips for Getting It Right

A simple plum jam gently spiced with clove and vanilla. Lower in sugar, beautifully balanced, and easy to adapt once you understand the method.
Makes 3-4 x 270 ml jars
No ratings yet
Print Pin
Course: Side Dish
Cuisine: modern australian, Modern Australian / Preserving, Preserving
Diet: Gluten Free, Vegetarian
Prep Time: 10 minutes
Cook Time: 25 minutes
Servings: 4 jars
Calories: 346kcal
Author: Nellie Kerrison | Relish Mama
Cost: $10

Equipment

  • Large saucepan or wide-based pot
  • Wooden spoon or heatproof spatula
  • Small plate (for testing set)
  • 2–3 glass jars with lids (sterilised)
  • Knife and chopping board
  • Citrus juicer (optional)
  • Sugar thermometer (optional)

Ingredients

  • 800 g ripe plums stones removed and cut into pieces
  • 250 g white sugar
  • 1 lemon juiced
  • 3 cloves
  • 1 teaspoon vanilla bean paste or seeds from ½ vanilla bean

Instructions

  • Place the plums, sugar, lemon juice, cloves and vanilla into a bowl or directly into your saucepan. Mix gently to combine, then cover and refrigerate overnight if time allows. This helps draw out the juices and gives a better texture and flavour.
  • The next day, place a small plate into the freezer.
  • Bring the fruit mixture to the boil over a medium–high heat, stirring occasionally so it doesn’t catch. Once boiling, cook for 20–30 minutes, stirring every now and then.
  • After about 5 minutes of cooking, remove the cloves if you prefer a more subtle spice, or leave them in longer for a stronger flavour.
  • Continue cooking until the jam thickens and becomes glossy. If using a thermometer, aim for 104–105°C.
  • To test without a thermometer, spoon a little jam onto the chilled plate, wait a moment, then gently push it with your finger. If it wrinkles slightly and holds its shape, it’s ready. If still runny, cook for a few more minutes and test again.
  • Once ready, remove from the heat and allow to sit for a couple of minutes.
  • Pour into warm, sterilised jars, seal and allow to cool completely.

Notes

This is a lower sugar jam, so it won’t keep as long as traditional jams, but will store well for months unopened. Once opened, keep refrigerated.
The overnight resting step is recommended for firmer fruits like plums, peaches or apricots. For softer fruits such as raspberries or strawberries, you can skip this step and cook immediately.
If your jam sets a little softer, it’s still perfect for spooning over yoghurt, porridge or warm baked goods.

Nutrition

Calories: 346kcal | Carbohydrates: 88g | Protein: 2g | Fat: 1g | Saturated Fat: 0.1g | Polyunsaturated Fat: 0.1g | Monounsaturated Fat: 0.3g | Sodium: 2mg | Potassium: 354mg | Fiber: 4g | Sugar: 84g | Vitamin A: 696IU | Vitamin C: 33mg | Calcium: 21mg | Iron: 1mg

I’m Nellie, cooking teacher, recipe developer and founder of Relish Mama.

Since 2009, I’ve been bringing people together around real food, recipes made to cook, share, and enjoy.

FREE ONLINE COOKING CLASS

Homemade Gnocchi with Nellie

A video cook-along with Nellie + recipes + shopping list.

Love my in person classes? Keep the inspiration going at home.

Cooking skills, delicious food and community every month in the comfort of your own home.

If you leave the studio wishing you could bottle the inspiration (and the recipes), or you’re too far away to come in-person, the Relish Mama Cooking Club is for you.


Join Nellie online each month for live cooking classes, and receive fresh, achievable recipes and meal ideas every week. It’s like having Relish Mama in your kitchen – keeping dinner interesting, seasonal and joy-filled.


Members also enjoy special perks for in person and online classes, plus a warm community of food lovers who are always ready to share what they’re cooking.

All time favourite recipes loved by you

FREE ONLINE COOKING CLASS

Gnocchi With Nellie

Learn my simple method, cook along at your own pace, and finish with dinner you’ll be proud of.

Includes video class + recipes + shopping list.

You’ll also receive my weekly recipe email. Unsubscribe anytime.