
We completed our fifth family challenge this week by setting up and starting our worm farm and our large compost bin. Setting the new challenges each week has been a lot of fun is definitely making us accountable. Most importantly for me is that I feel or I hope we are teaching our children that it is the little things we do in life that can help to make a difference. We are making our choices matter.
The benefits of worm farming and composting are that we help our environment by reducing the amount of organic waste going to landfill. We have a lot of waste at home and from the cooking school so this was definitely the sealer for me. 1kg of worms can consume 500grams to 1kg of food scraps per day. Our worm farm can house up to 5 kg of worms. Another benefit is that we can now also start producing organic fertilizer for the garden and produce nutrient-rich compost tea for the plants. Unless I could eat what was growing, I have never, in the past, been that diligent with other plants in the garden but I am sure this will be no longer. I can feel my ‘Costa’ moment looming – Hello ABC Gardening Australia. You shall laugh at me no more!
This is a little different to my other posts, most obviously for the fact that I am not whipping up something for us to enjoy and along with it, sharing the recipe and it’s story. Instead, I will share what I/we can do with the scraps after whipping up our usual tasty creations. Sure, it’s not as glamourous but I don’t think there was ever any way to make a post about worm farming and landfill glamorous! We hope that you might join us with setting up one or both of these composting products, especially after you see how easy it is to do.
Setting up a worm farm :
We purchased our kits from our local council and they required simple assembly, however, you can definitely whip up your own worm farm using plastic tubs and a drill but I think an internet search would better equip you here. Our local council sell the kits at reduced rates to encourage people to compost and be more enviromentally friendly and they delivered to our door too – win win! I would imagine most local councils offer a similar service so it would pay to check with yours.
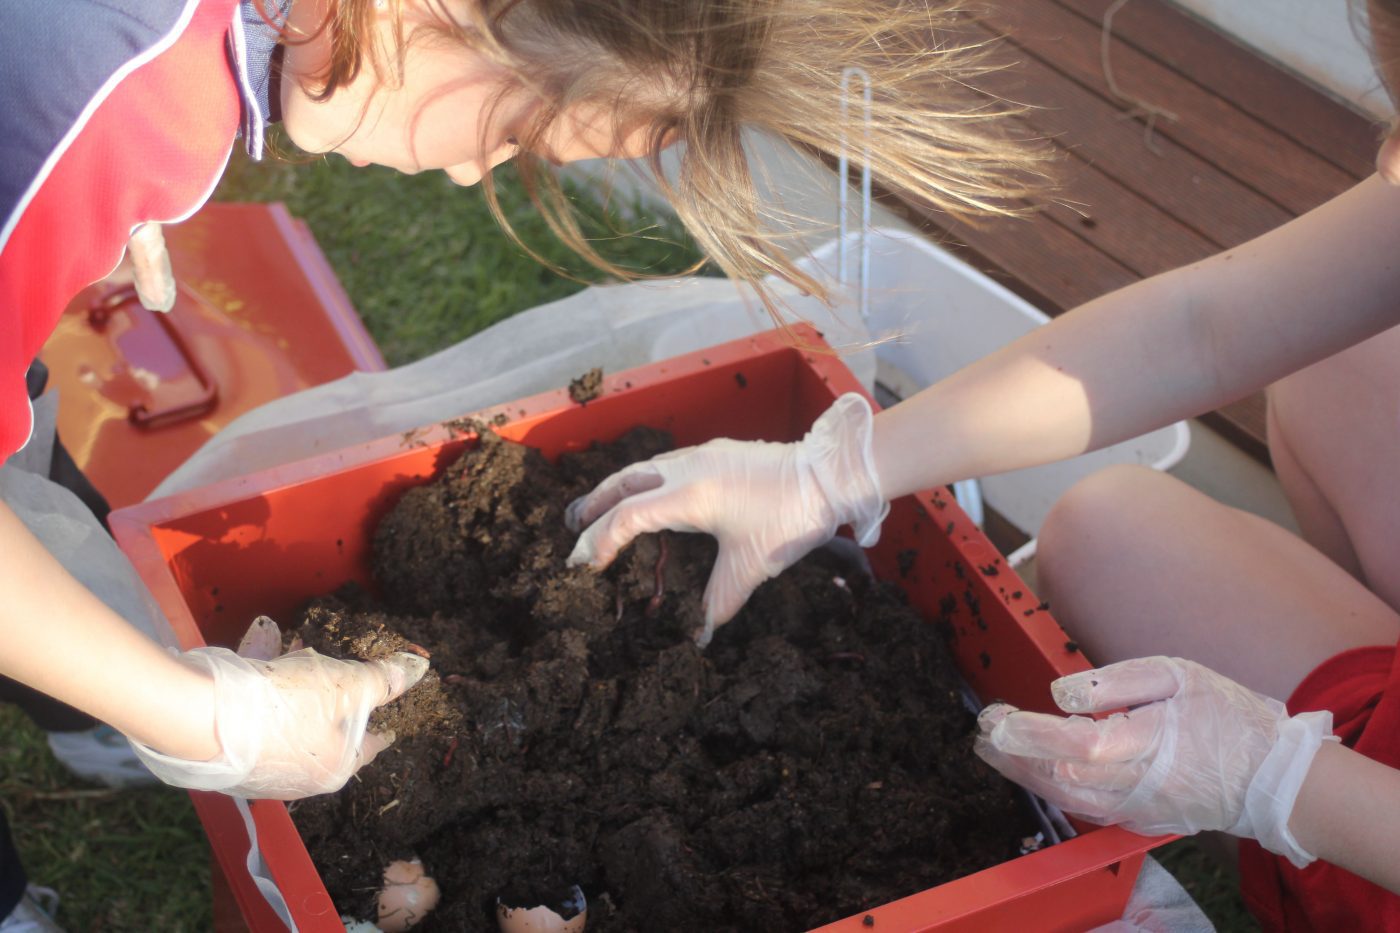
Michael and the girls set up both kits last Sunday morning on Father’s Day. Not entirely sure it was what he was hoping for on Father’s Day but I did knock him up a lovely Father’s day breakfast a)because I love him and b) because I needed some egg shells to start our worm bed! The kits took no more than ten minutes to put together once Michael was in ‘Man mode’ (it seems the tool belt always has to come out). Our three children were eager to get involved – it was our younget who had set this family challenge after all and yes, they too all had to have a turn with said tool belt. Our worm farm kit came with coconut fibre and I believe most do. We simply soaked this fibre for 2 hours and I also threw in some shredded newspaper. This was laid out in our first working tub. You want your worm bed moist but not wet so giving it a good squeeze before laying it out is essential. They say the key to healthy and happy worms first starts with their bedding. We added some of our crushed egg shells from breakfast to the bed and we were then ready to introduce our little wriggling friends to their new home. At this point, squeals of both delight and disgust bellowed, quite loudly, from our children’s mouths. All kids seem fascinated with worms so to be adding approximately 1000 of our very own created quite a buzz. I hope the buzz lasts and might buy us some time to come up with more creative excuses as to why we can’t get another dog, cat, fish, bird, etc. Go play with the worms please kids! After our worms were introduced to their new home, we added a small amount of food to their bed. They say one of the most common mistakes with worm beds is that people over feed them. It can take 2 to 4 weeks for the worms to settle and they may not eat a lot of food before then. We however seem to have very settled worms and they are ‘eating our garbage’ like there is no tomorrow. A good guide is that when you see half of the food disappear, it is time to add new food. After a period of time, our working tray will fill. When it is ¾ full, it will be time to add our second working tray. We do not need to make more bedding again but simply spread a handful of food on to this new tray and the worms should migrate upwards in search of the food and well I figure they think they have worked hard enough to get themselves a new and imporoved home and an addition of a second storey. You can keep adding working bins as needed.
So about the food……..Ideal foods to feed your worms are vegetables, fruit (no citrus including pineapple), egg shells, shredded paper and cardboard, tea bags, tea leaves, ground coffee, coffee filters, hair from both animals and humans (I quite fancy the thought of the worms ‘styling’ each other with their new wigs), manure from cows and horses, sawdust from wood, ash from wood, decayed garden leaves and grasses. You cannot feed your worms any meat or dairy or citrus fruit, cookings oils and fats, fish, onions, tomatoes, plant seeds. As our youngest child has established, worms do not have teeth (one worm got a full medical check up before enjoying the comforts of his new home) and therefore, chopping or breaking foods in to smaller pieces helps the worms to get through it quicker and stops bacteria growing on the food. If the worm farm is looked after properly, there shouldn’t be a smell and perhaps just a slight one when the lid is lifted. If you have a strong odour, you may want to check your worms aren’t being overfed or being fed any foods they shouldn’t consume and that they are not too wet or too dry. You need to keep your worms moist but again, not wet. They need to be out of direct sunlight so they do not overheat and as a result, possibly die. This wouldn’t go down well at your next worm farmers ‘meet and greet’. The easiest way to cool down your worm farm is to add ice cubes in the morning of an anticipated hot day or spray it with a water spray to help moisten and keep cool.
You can collect the worm liquid or worm tea about once a week and dilute it 10:1 (or until it resembles weak tea) to pour onto your plants and vegetables. We have used this worm tea on our garden in the past and the difference it made was quite remarkable so I am excited, to say the least. When the material in your bottom tray is almost all castings and no food is visible (looks like soil) you can harvest this tray by placing the contents on plastic sheeting, bucket or whatever works for you and it is now ready to be used as a soil conditioner or mixed with water and use as a liquid feed.
Setting up a compost bin :
So on to the compost bin and again, this took no time to assemble. You may not need both a worm farm and compost bin but we decided to do both at once given we wanted to really make an impact in reducing the waste we were sending off to landfill. In this first week, I would estimate we have reduced our waste by at least a third and this is increasing daily as we get in to the habit of asking ourselves “Can I compost this”? “ Can the worms eat this?” There is also a wider selection of waste that can go into a compost bin and I have included a rather extensive list at the bottom of this post. The main benefits of composting are, as said, to vastly reduce waste in the home, increase nutrient levels of soils and plants, produce healthier plants, fruit trees and vegetable that will also be less prone to disease. Composting is also a great way of introducing children to the garden.
A few little things to note, your compost bin actually benefits from being in a warm position to encourage breakdown of materials. The location of the bin should be convenient. Ours is very close to our kitchen door which makes for very convenient ‘dumping’. Your compost bin benefits from being placed on top of bare earth and there you have it – pretty easy isn’t it? We have now taken to stacking our waste in the compost bin. Too much of one material can slow the composting process so after a few layers of successive materials have been added, you can sprinkle a generous amount of lime. This also neutralizes any potential odours. Turn the heap every few weeks and in 9 to 10 weeks, you will have produced your very own compost and you too will be ready to chanel your own Costa, Jamie Durie, Don Bourke or whatever gets your gardening groove going. Good luck with setting up yours – we hope you do join us!


Can I compost this ?
Compost from the kitchen
Coffee grounds and filters
Tea bags and tea leaves
Vegetable and fruit peelings
Cut flowers
Egg shells
Used paper napkins
Pizza boxes, ripped into smaller pieces
Paper bags, either ripped or balled up
The crumbs you sweep off of the counters and floors
Plain cooked pasta
Plain cooked rice
Stale bread
Paper towel rolls
Stale saltine crackers
Stale cereal
Used paper plates (as long as they don’t have a waxy coating)
Nut shells (except for walnut shells, which can be toxic to plants)
Old herbs and spices
Stale pretzels
Pizza crusts
Cereal boxes (tear them into smaller pieces first)
Wine corks
Moldy cheese
Paper egg cartons
Toothpicks
Bamboo skewers
Paper cupcake or muffin cups
From the Bathroom
Hair from your hairbrush
Toilet paper rolls
Old loofahs
Nail clippings
100% Cotton cotton balls
From the Laundry
Dryer lint
From the Office
Bills and other documents you’ve shredded
Envelopes (minus the plastic window)
Pencil shavings
Sticky notes
Business cards (as long as they’re not glossy)
Receipts
Around the House & Garden
Contents of your vacuum cleaner bag or canister
Newspapers (shredded or torn into smaller pieces)
Leaves trimmed from houseplants
Dead houseplants and their soil
Cut flowers from floral arrangements
Natural potpourri
Used matches
Ashes from the fireplace, barbecue grill, or outdoor fire pit
Party and Holiday Supplies
Wrapping paper rolls
Paper table cloths
Raffia
Your Christmas tree. Chop it up with some pruners first (or use a wood chipper, if you have one…)
Pet-Related
Fur from the dog or cat brush
Feathers
Don’t put in Fatty foods such as excess cooking oils, dairy products and meats as will encourage flies and other animals.Don’t put in plants that grow suckers or bulbs as they may sprout up when not wanted.Don’t put in weeds which have flowered as will likely add weed seeds to the compost bin.Don’t put in diseased plants will transmit the disease and remain in the compost and later spread to your healthy plants.